Setup
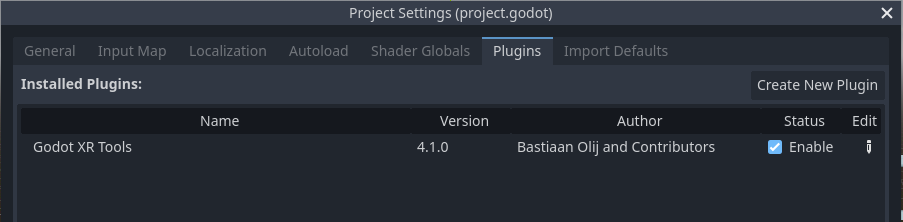
There is no code needed to initialize the add on but you will want to enable the plugin after installing it.
For this open your Project Settings and enable the plugin there:
Every Godot XR project expects the following node tree in order to work:
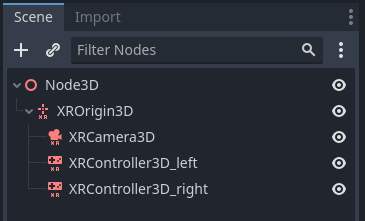
We do assume here that we have controllers. If you are writing a 3DOF game or experience those are not needed.
Many of the XR plugins will have scenes that configure this for you but often with platform specific logic embedded. If you’re creating a headset agnostic game setting this up yourself is advised.
Initialising XR
You will also need to add some code to initialise the XR plugin. See the instructions for each plugins but it will follow this form:
func _ready():
	var interface = XRServer.find_interface("name of the plugin")
	if interface and interface.initialize():
		# turn the main viewport into an ARVR viewport:
		get_viewport().arvr = true

		# turn off v-sync
		OS.vsync_enabled = false

		# put our physics in sync with our expected frame rate:
		Engine.iterations_per_second= 90
You can also include the addons/godot-xr-tools/xr/start_xr.tscn in your project. This sets everything up using either Godot’s build in OpenXR or WebXR support.
Shader cache
You should add the addons/godot-xr-tools/misc/vr_common_shader_cache.tscn subscene as a child of the XRCamera node:
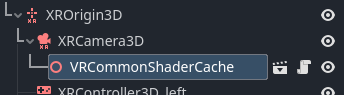
This ensures the shaders that are used to render various parts of this toolkit are compiled when the game loads.
XR Staging
Alternative to the above, Godot XR Tools also has a boilerplate setup called staging. This contains all the code to setup XR, create zones (levels) and switch between them, and handle background loading for your project.
Find more info about staging here.