Meta Passthrough
Note
Check out the Meta Passthrough Sample Project for a working demo of Meta passthrough features.
If your project requires the user to see their physical environment, you'll need to use the headset's passthrough functionality. The Godot OpenXR Vendors Plugin provides access to several passthrough modes and filters supported on the Meta Quest, all of which will be broken down in this tutorial.
Project Settings
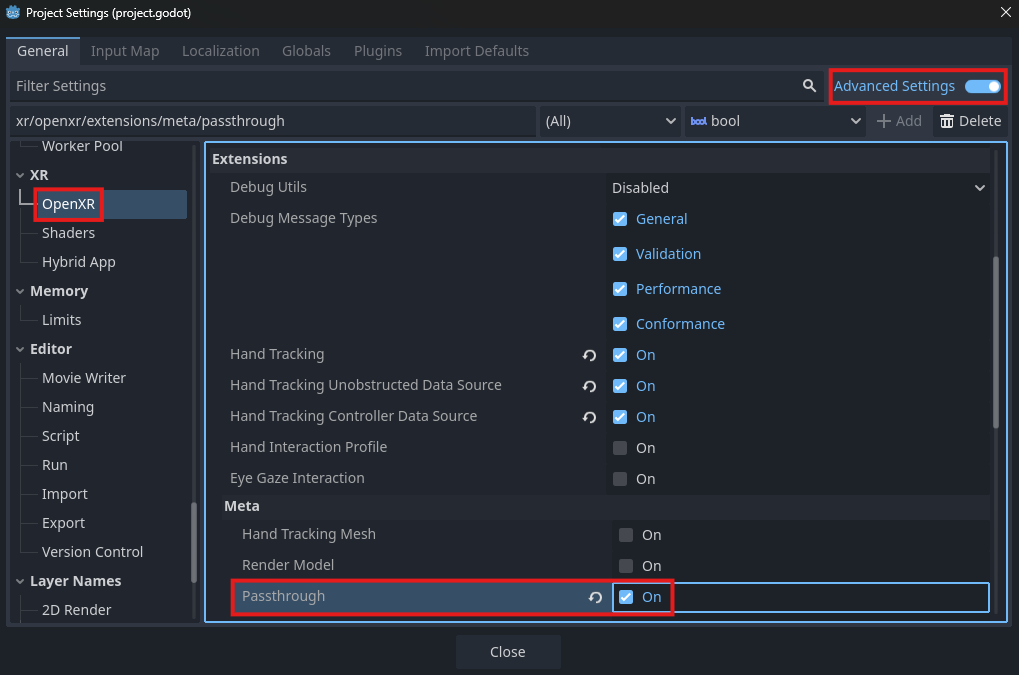
In order to utilize passthrough, you'll have to enable the feature. Open up Project Settings and navigate to the OpenXR section. The Passthrough setting should be found under Extensions in the Meta subcategory. This setting is only visible when Advanced Settings are enabled.
Reconstruction Passthrough
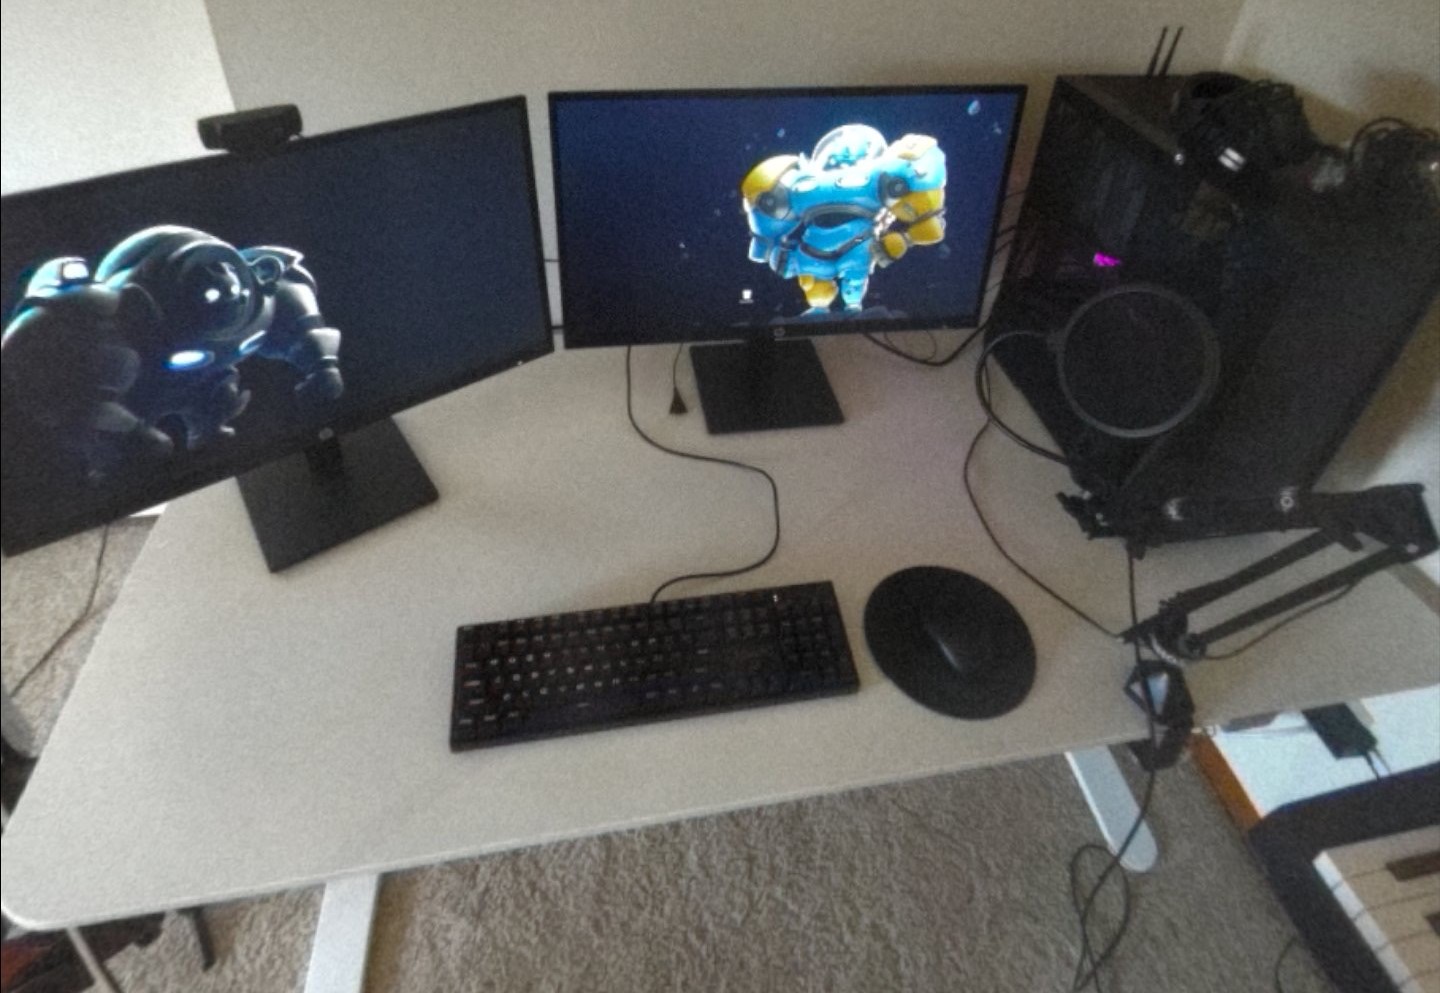
Example of unfiltered reconstruction passthrough imagery (Quest Pro)
Reconstruction passthrough will fill the entire background with imagery of the user's surrounding environment, thus "reconstructing" the space outside of the headset. To enable this passthrough mode, ensure the following:
The viewport's
transparent_bgproperty is set totrue.The environment's
background_modeproperty is set toEnvironment.BG_COLOR.The environment's
background_colorproperty should have an alpha value of0.0.The OpenXRInterface's
environment_blend_modeproperty is set toXRInterface.XR_ENV_BLEND_MODE_ALPHA_BLEND.
The OpenXRInterface parent class XRInterface has a method get_supported_environment_blend_modes()
that will list XRInterface.XR_ENV_BLEND_MODE_ALPHA_BLEND if it is supported. To enable reconstruction passthrough, you might add the following to the script attached to the root node of your main scene:
extends Node3D

@onready var world_environment: WorldEnvironment = $WorldEnvironment

func _enable_passthrough(enable: bool) -> void:
    var openxr_interface: OpenXRInterface = XRServer.find_interface("OpenXR")

    # Enable passthrough if true and XR_ENV_BLEND_MODE_ALPHA_BLEND is supported.
    # Otherwise, set environment to non-passthrough settings.
    if enable and openxr_interface.get_supported_environment_blend_modes().has(XRInterface.XR_ENV_BLEND_MODE_ALPHA_BLEND):
        get_viewport().transparent_bg = true
        world_environment.environment.background_mode = Environment.BG_COLOR
        world_environment.environment.background_color = Color(0.0, 0.0, 0.0, 0.0)
        openxr_interface.environment_blend_mode = XRInterface.XR_ENV_BLEND_MODE_ALPHA_BLEND
    else:
        get_viewport().transparent_bg = false
        world_environment.environment.background_mode = Environment.BG_SKY
        openxr_interface.environment_blend_mode = XRInterface.XR_ENV_BLEND_MODE_OPAQUE
Projected Passthrough
In this passthrough mode (sometimes referred to as geometry passthrough), passthrough is "projected" onto custom geometry, meaning passthrough imagery will only be visible in certain areas. You might use this passthrough mode to show only specific objects in a user's physical environment, while rendering the rest in VR.
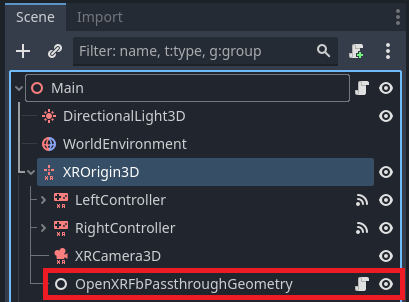
Enabling projected passthrough only requires the addition of a visible OpenXRFbPassthroughGeometry
node as a child of XROrigin3D. Don't forget to assign the node's mesh property!
Note
If the XRInterface.XR_ENV_BLEND_MODE_ALPHA_BLEND blend mode is set and supported on the headset, reconstruction passthrough will always take priority over projected passthrough.
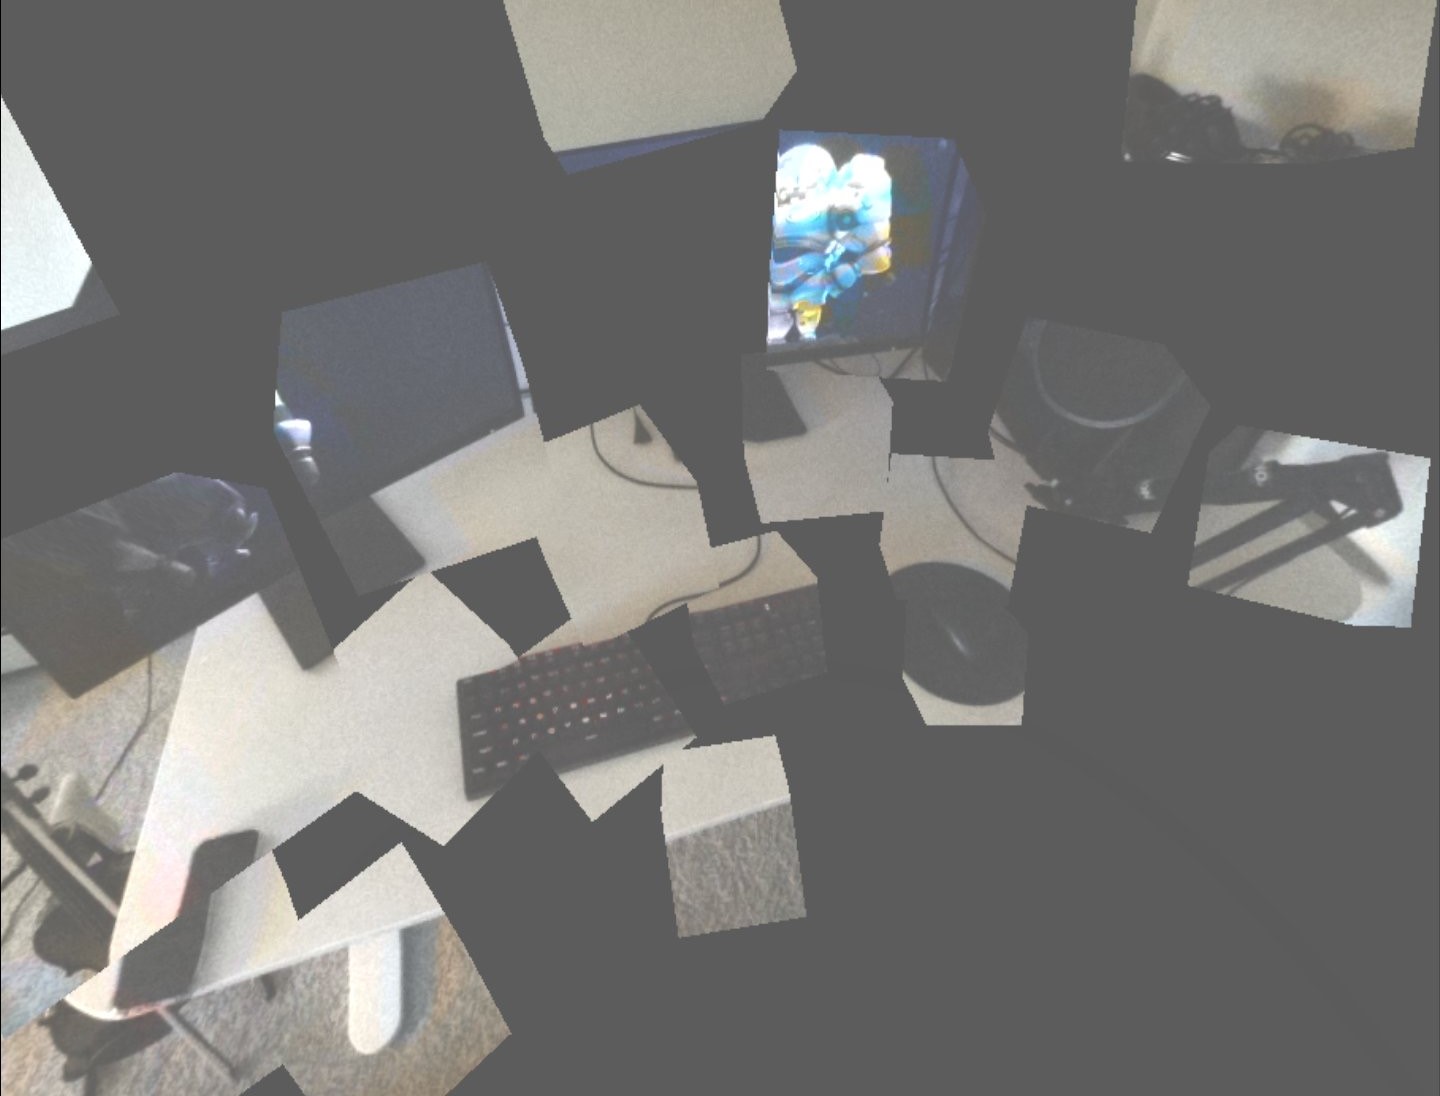
It's important to understand the enable_hole_punch property on this node. With this property set to true,
anything Godot renders behind the mesh will be removed from view. If set to false, objects rendered behind the mesh will still be visible in front of the passthrough.
By default, enable_hole_punch is set to true.
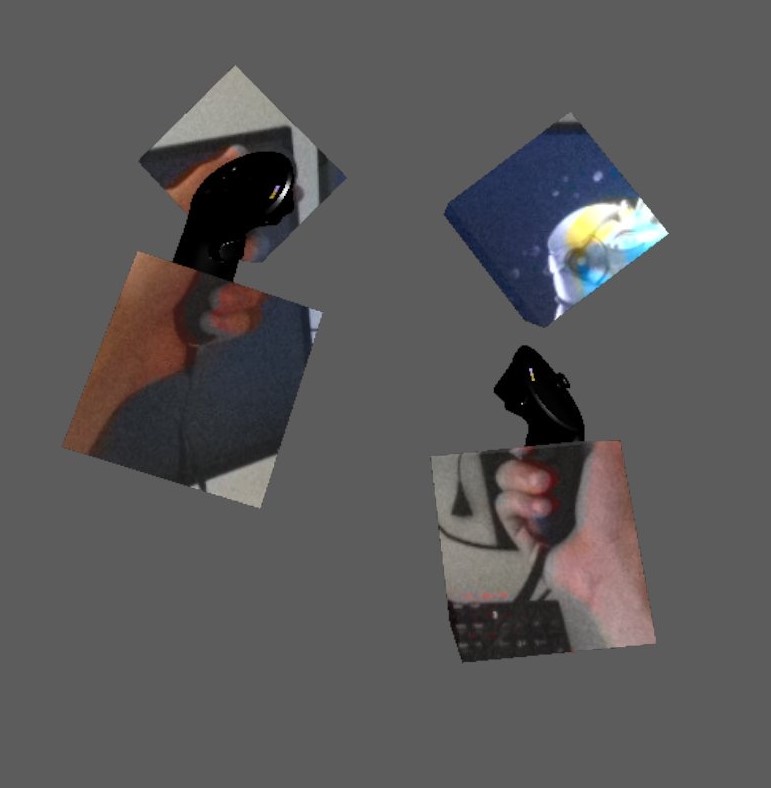
Hole-punched geometry hiding parts of controller models that are rendered behind the meshes.
It's not possible to display hole-punched OpenXRFbPassthroughGeometry nodes simultaneously with nodes that have hole-punching disabled.
This is because hole-punching requires the viewport's transparent_bg property to equal false.
If you want your passthrough geometry to have hole-punching disabled, you might use a startup script similar to the one in Reconstruction Passthrough
without updating the environment_blend_mode.
Passthrough Loading Screen
When making an app that utilizes passthrough, having the app load with passthrough active might be desirable to create a smoother startup experience. To accomplish this, open Project Settings. In the OpenXR section, ensure that Environment Blend Mode is set to a value other than opaque.

With this setting updated, the app will load in passthrough if the user launches the app while their device's home environment is in passthrough. If your app has both an MR and VR mode, consider using is_passthrough_preferred to determine which mode to enter once the app has completed loading.
Passthrough Filters
Meta headsets are capable of applying a variety of filters to the passthrough imagery, allowing you to modify the appearance of the user's physical environment.
There are a number of methods in OpenXRFbPassthroughExtension that allow you to access these features.
You can call these methods on the OpenXRFbPassthroughExtension singleton, which can be obtained like so:
var fb_passthrough = Engine.get_singleton("OpenXRFbPassthroughExtension")
You can check what PassthroughFilter is enabled by calling get_current_passthrough_filter.
By default, the filter mode will be set to PASSTHROUGH_FILTER_DISABLED.
To change the current passthrough filter, you can call one of the following functions:
The current passthrough filter can also be updated by calling set_passthrough_filter.
This function will most often be used to disable passthrough filters, as calling it with PASSTHROUGH_FILTER_DISABLED is the only way to return to that filter mode.
Swapping to any other filter mode using this function will require its corresponding setter function in the above list to have been called previously.
Also note that there are two filter properties that can be set regardless of the current filter mode. These can be set using the functions:
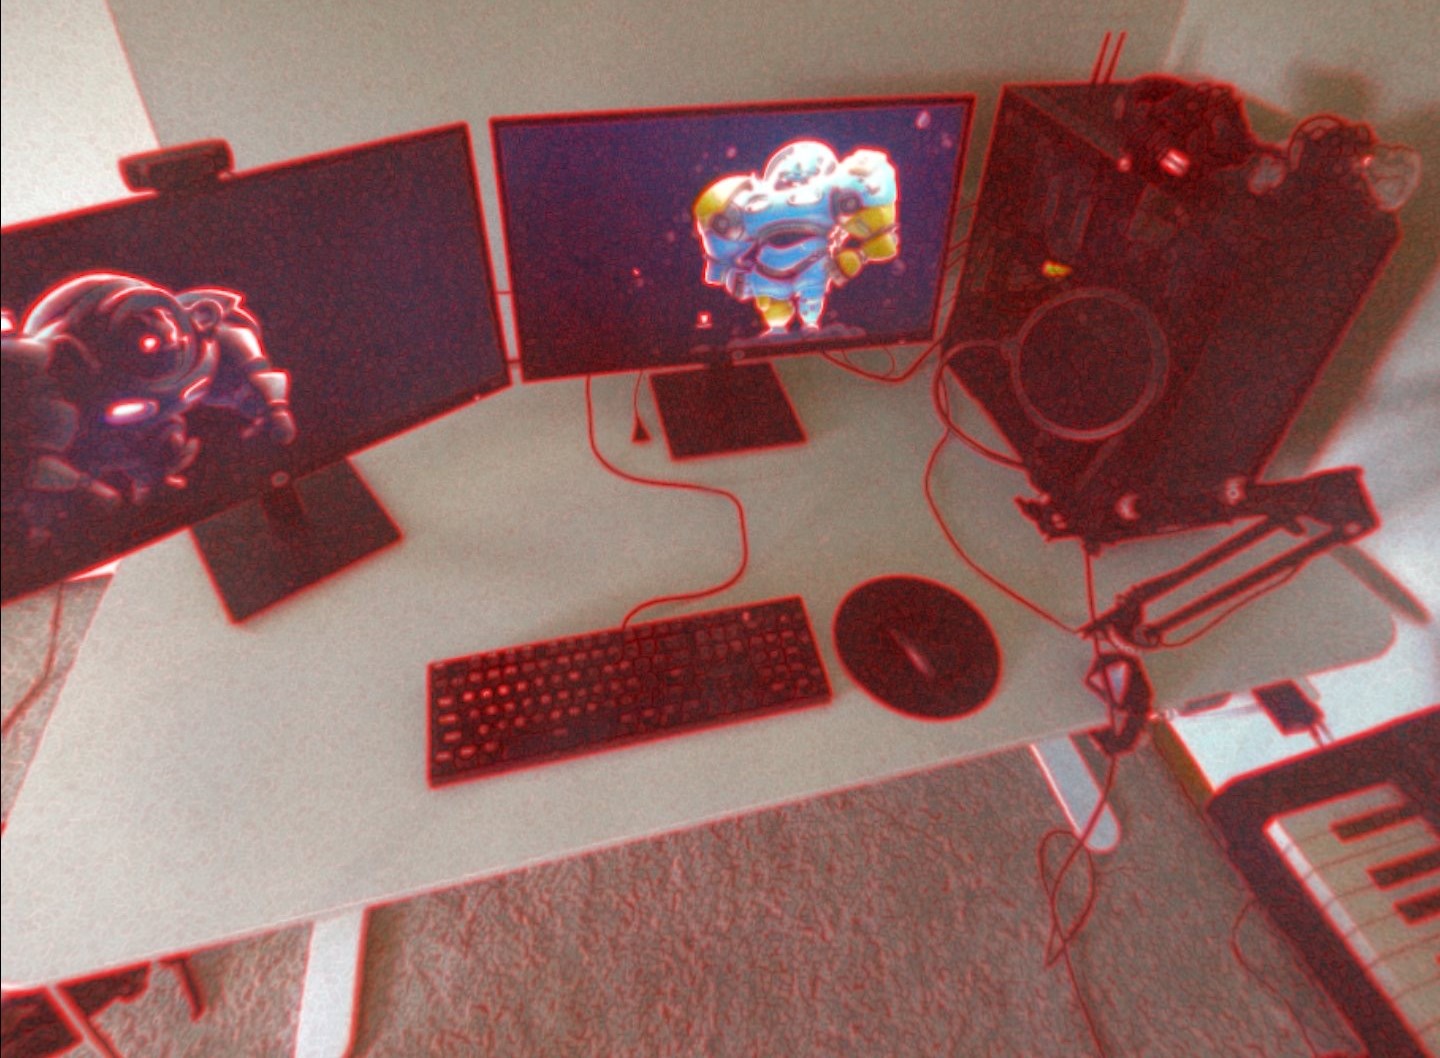
Reconstruction passthrough after setting a red edge color.
Note
Values passed into set_edge_color() and set_texture_opacity_factor() will apply to all filter modes, even PASSTHROUGH_FILTER_DISABLED.
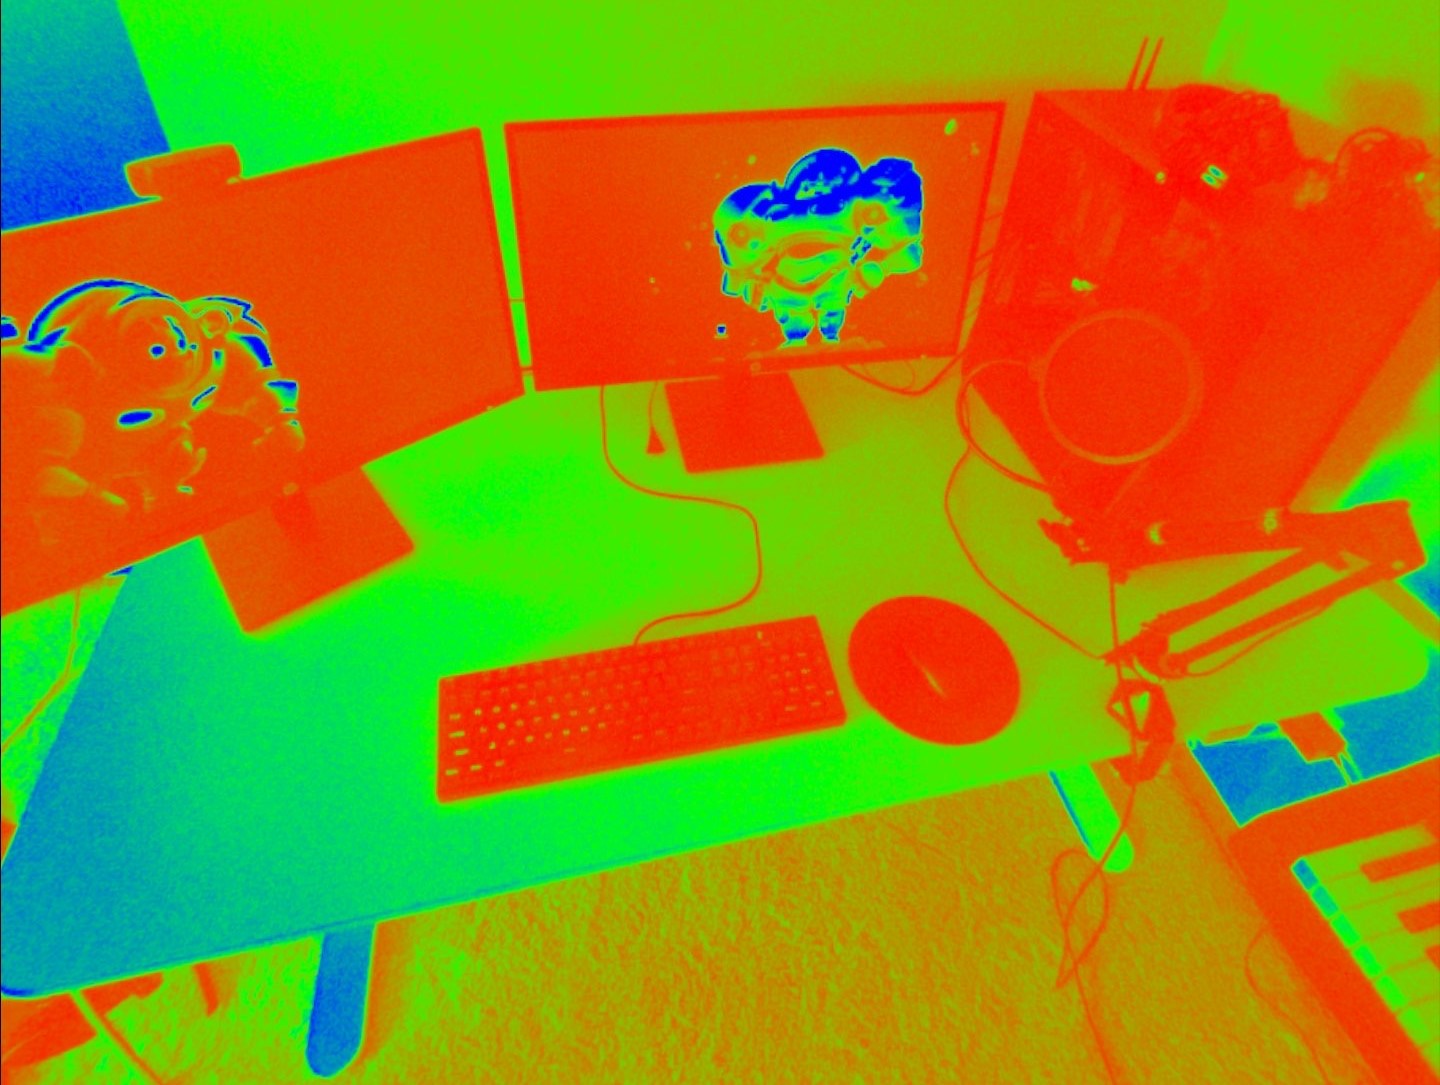
Color Map Filter
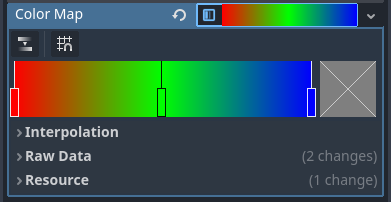
The set_color_map method accepts a Gradient resource and will set the filter mode to PASSTHROUGH_FILTER_COLOR_MAP. This filter will map the input luminance value of the passthrough imagery to the corresponding RGBA value of the given gradient.
Here's what it might look like in the script and inspector to achieve this:
@export var color_map: Gradient

...

fb_passthrough.set_color_map(color_map)
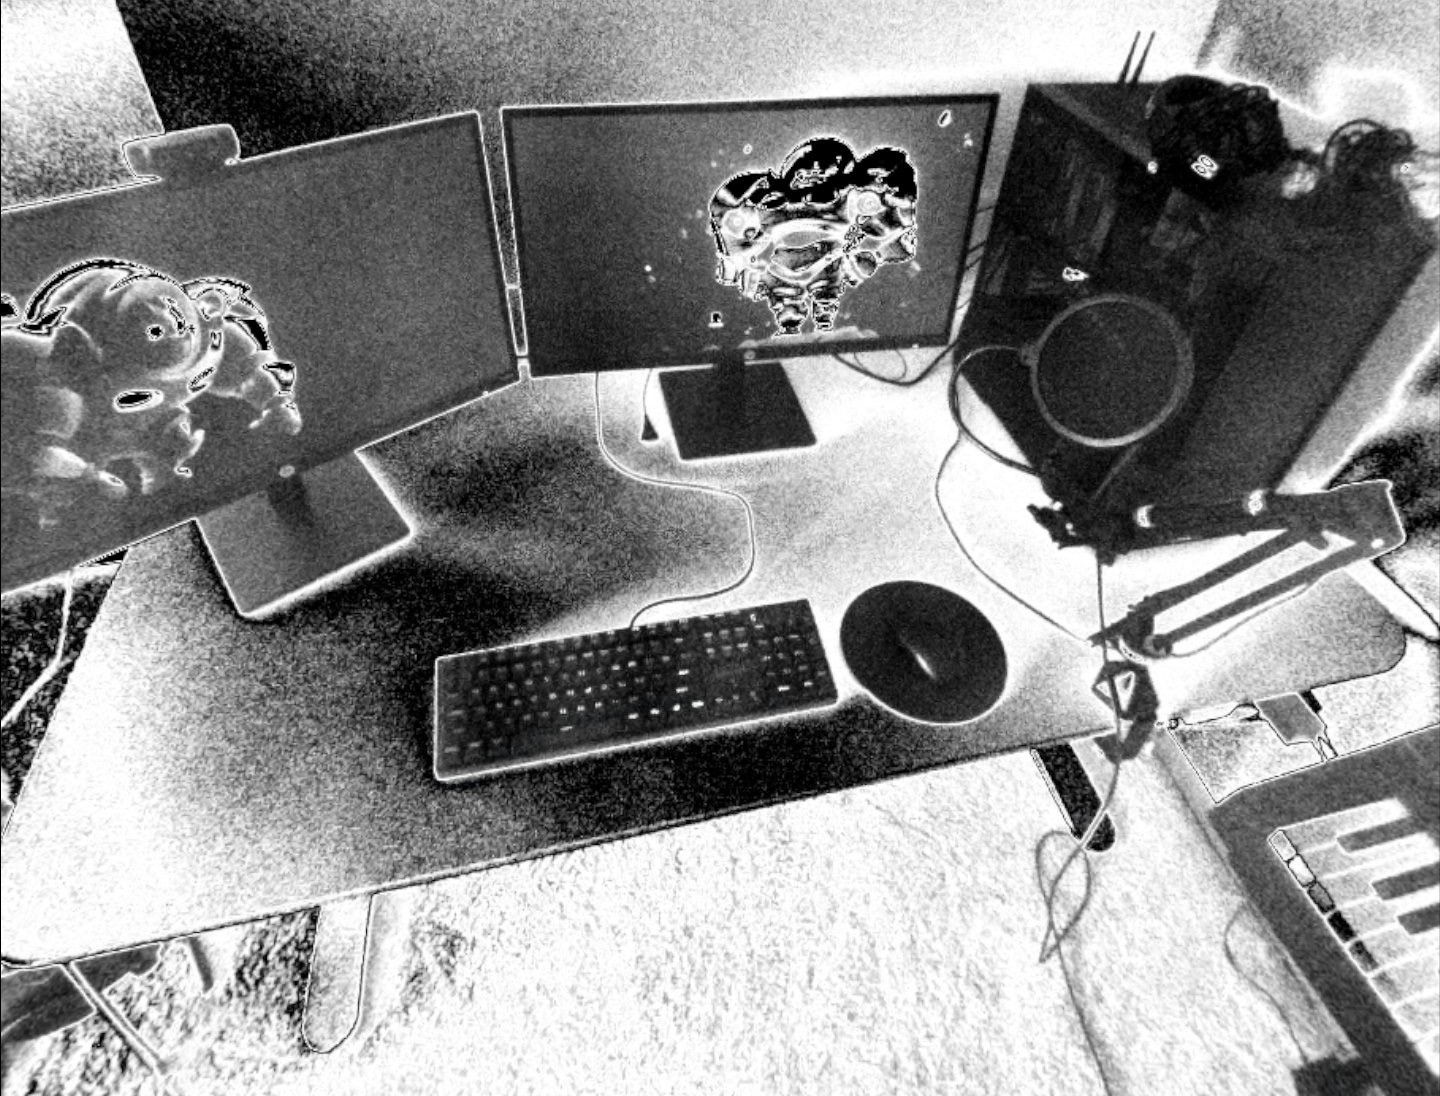
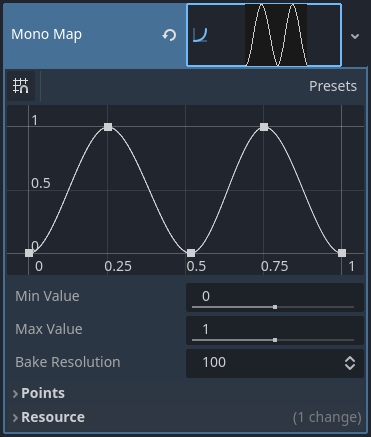
Mono Map Filter
The set_mono_map method accepts a Curve resource and will set the filter mode to PASSTHROUGH_FILTER_MONO_MAP. This filter will map the input luminance value of the passthrough imagery with the corresponding grayscale value of the given curve.
Here's what it might look like in the script and inspector to achieve this:
@export var mono_map: Gradient

...

fb_passthrough.set_mono_map(mono_map)
Brightness Contrast Saturation Filter
The set_brightness_contrast_saturation method accepts three float values
and will set the filter mode to PASSTHROUGH_FILTER_BRIGHTNESS_CONTRAST_SATURATION.
This filter will adjust the brightness, contrast, and saturation of the passthrough imagery. The valid ranges of each value are noted in the method description of set_brightness_contrast_saturation.
Here's what it might look like in the script to achieve this:
# Optionally allow the values to be edited in the inspector as a Vector3.
@export var brightness_contrast_saturation: Vector3 = Vector3(10.0, 0.5, 0.5)

...

fb_passthrough.set_brightness_contrast_saturation(brightness_contrast_saturation.x, brightness_contrast_saturation.y, brightness_contrast_saturation.z)
Color LUT Filter
Note
This article by Meta provides a good introductory explanation on how to create a color LUT (Look Up Table / Look Up Texture).
The set_color_lut method accepts an OpenXRMetaPassthroughColorLut resource
along with a float between 0.0 and 1.0 that is used to blend linearly between the original passthrough input colors and the mapped color LUT.
This method will set the filter mode to PASSTHROUGH_FILTER_COLOR_MAP_LUT.


The color LUT used to achieve the above inverted color effect.
To create an OpenXRMetaPassthroughColorLut resource, you'll have to pass an Image resource along with a ColorLutChannels value
into the static OpenXRMetaPassthroughColorLut create_from_image method, similar to the example below:
# Assign the color LUT image in the inspector
@onready var color_lut: Image

...

var meta_color_lut: OpenXRMetaPassthroughColorLut = OpenXRMetaPassthroughColorLut.create_from_image(color_lut, OpenXRMetaPassthroughColorLut.COLOR_LUT_CHANNELS_RGB)
Then, to fully apply the color LUT, we pass in meta_color_lut with a weight value of 1.0 to the setter function like so:
fb_passthrough.set_color_lut(1.0, meta_color_lut)
Note
You can check the maximum color LUT resolution supported by the headset at runtime using the get_max_color_lut_resolution method.
Lastly, if you want to smoothly interpolate between two given color LUT weight values over time, you can use a tween! The following example will interpolate the weight from 0.0 to 1.0 over a period of two seconds.
var tween = create_tween()
tween.tween_method(fb_passthrough.set_color_lut.bind(meta_color_lut), 0.0, 1.0, 2.0)
Interpolated Color LUT Filter
This filter mode works the same way as the Color LUT Filter, only it requires the use of two OpenXRMetaPassthroughColorLut resources.
The set_interpolated_color_lut method will accept those two resources, along with a float value between 0.0 and 1.0
that will be used to blend linearly between the two color LUTs. Calling this function will set the filter mode to PASSTHROUGH_FILTER_COLOR_MAP_INTERPOLATED_LUT,
which will map the passthrough input to this interpolated color LUT.
The main purpose of this filter mode is to smoothly transition between two distinct color LUTs. Let's assume we have two valid OpenXRMetaPassthroughColorLut resources named meta_color_lut and meta_color_lut2.
If meta_color_lut is fully applied, we can smoothly transition to meta_color_lut2 over a period of two seconds using a tween like so:
var tween = create_tween()
tween.tween_method(fb_passthrough.set_interpolated_color_lut.bind(meta_color_lut, meta_color_lut2), 0.0, 1.0, 2.0)
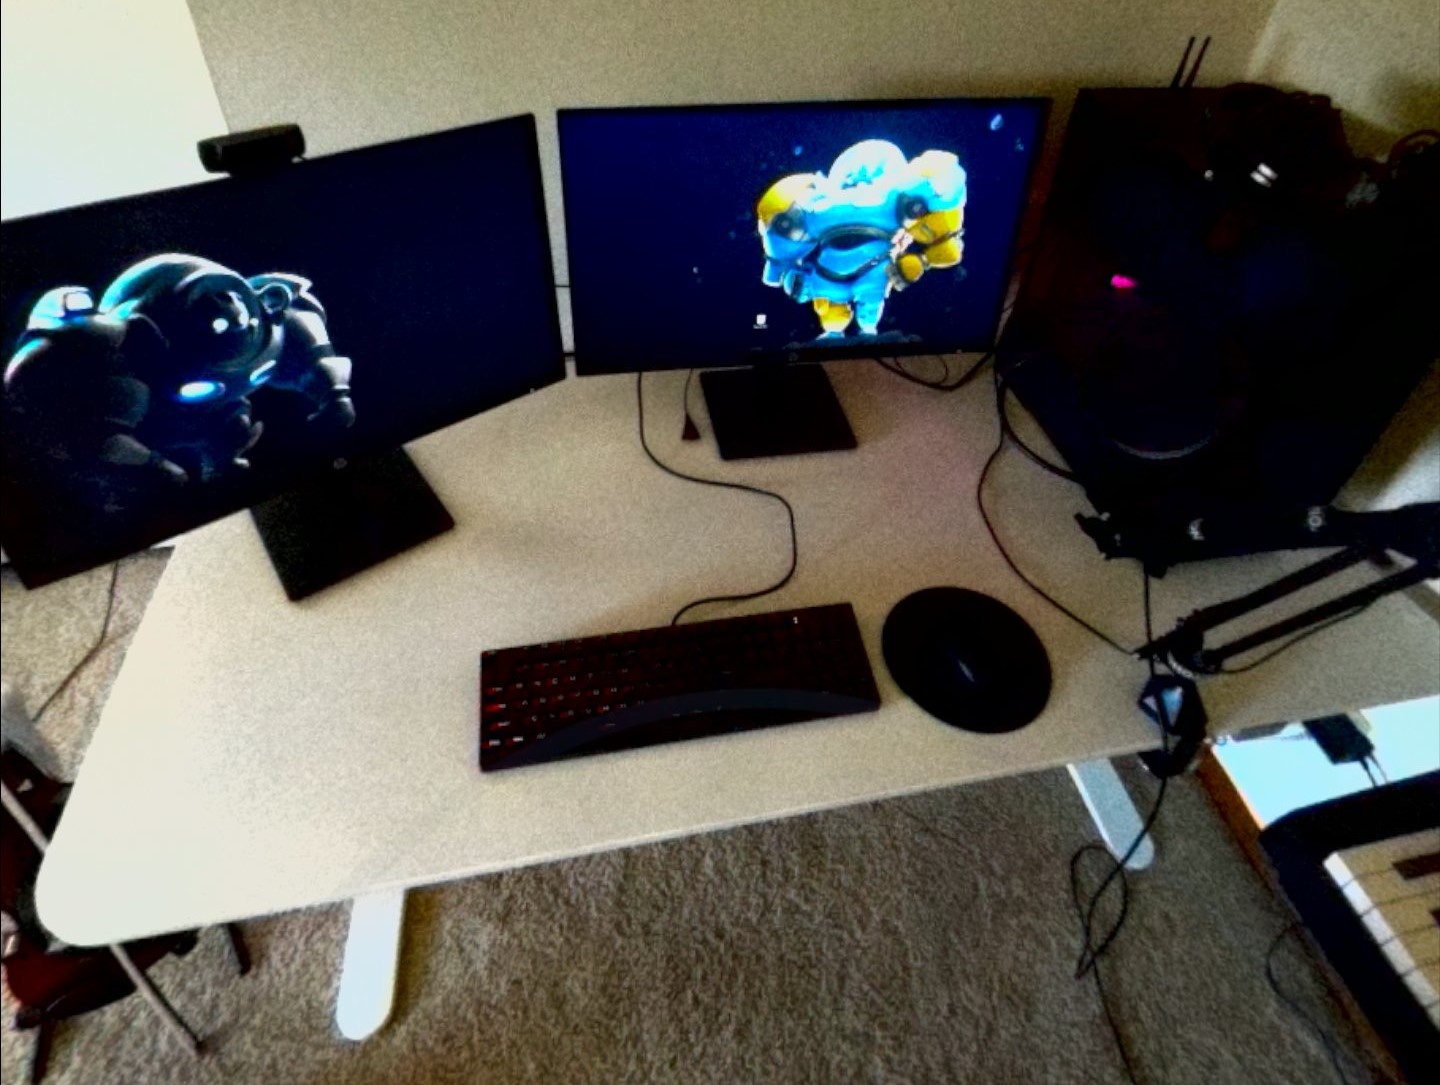
Boundary visibility
In passthrough mode, boundary visibility can be toggled by making use of the XR_META_boundary_visibility extension.
This requires enabling the Boundary Visibility extension in Project Settings > XR > OpenXR > Meta (as well as the Passthrough extension in the same place, as described above under Project Settings).
Project settings required for the Boundary Visibility extension.
Note that the extension isn't in the OpenXR spec yet, so depending on the plugin release used (especially if self built), it needs to be built with the Meta SDK headers included as described in the Pull Request.
After enabling the extension in Project Settings, the OpenXRMetaBoundaryVisibilityExtension singleton and its method set_boundary_visible can be used to control whether the boundary is visible:
func toggle_boundary_visibility():
    if not OpenXRMetaBoundaryVisibilityExtension.is_boundary_visibility_supported():
        return
    var is_boundary_visible = OpenXRMetaBoundaryVisibilityExtension.is_boundary_visible
    OpenXRMetaBoundaryVisibilityExtension.set_boundary_visible(!is_boundary_visible)